| 材质:PC | 风格:运动 | 品牌:中性 |
| 适用品牌:苹果 | 工艺:注塑/注射 | 外型尺寸:13*8*3 |
| 颜色:黑色 | 适用型号:4S+ |
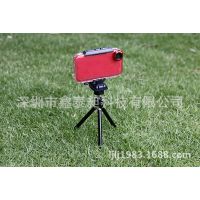
Tripods, monopods or any 1/4-20 screw mount
1. Make sure the multi kits has the Thumb-latch Quick Release connected.
2. Thread the bottom of the Tripod Mount onto the tripod you are using as far as you can.
3. Use the tripod’s adjuster function to take up any remaining slack and form a tight connection with the multi kits Mount.
4. Slide Quick Release onto the Tripod Mount and you’re done.
Warranty
We are dedicated to making the best quality products we can. To back this up, your multi kits is warranted for 1 full year from the date of purchase.
Warning
Read all instructions and warnings prior to using this product. Improper use of this product may result in product damage or excess heat for which damages you (“Purchaser”) are responsible.
Do not store product in high temperature environments, including intense sunlight or other forms of heat.
Although product is designed for high impact actthties, excessive crashes or impacts could cause damage. Check product before and after each use.
Make sure the inside of the case is completely dry before each use. To avoid moisture build up within the multi kits, especially when using the WaterSports back, use the provided anti-fog inserts.
When using adhesive mounts, thoroughly clean and dry the area you wish to adhere to before placing the mount Allow as much time for the mount adhesive to cure as you can allow and apply steady prolonged pressure. It can take up to 24 hours for a mount to fully adhere and set Check security of any mounts before and after each use.
Properly tighten all adjustment knobs and check for loose hardware before and after each use. Re-check after any crashes or excessive knocks and bumps.
Legal
This product is meant for use only in conjunction with the appropriate mobile entertainment device. Please consult your device packaging to determine whether this product is compatible with your particular mobile entertainment device. Manufacturer is not responsible for any damages to any mobile entertainment device incurred through the use of this product.
Manufacturer shall not in any way be liable to you or any third party for any damages you or any third party may suffer as a result of the use, intended or unintended, or misuse of this product in conjunction with any device or accessory other than the appropriate mobile entertainment device for which this product is designed. Manufacturer will not be responsible for any damages you or any third party may suffer as a result of the misuse of this product as outlined previously. If you are responsible for product use with an unintended mobile entertainment device and damages result from such use, you agree to indemnity Manufacturer for any resulting injuries to any third party(ies).

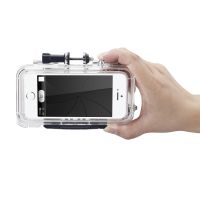
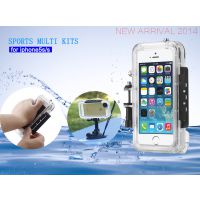
5S+ 4S+ 苹果防水运动配件
苹果防水壳
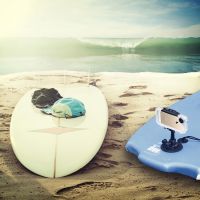
苹果防水运动DV
RD32
SJ4000
运动DV
运动摄像机
1080P运动摄像机
120度广角镜头
防水运动DV
苹果防水运动摄像机
10米防水
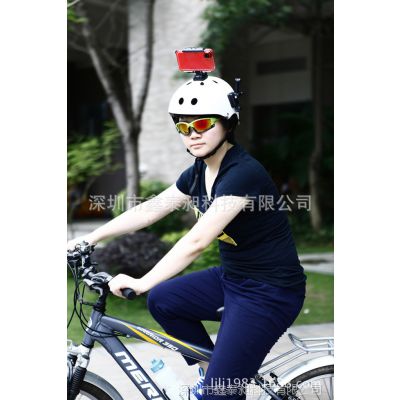
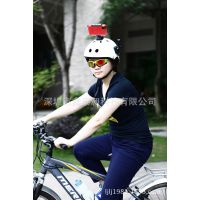
Mounting to Handlebar
Great for giving your viewers an idea of what you’re seeing.
1. Mount your multi kits to the top of the DogBone using the adjustment post knob that came with the multi kits. Use the hex wrench to tighten if needed.
2. Loosen the adjustment knobs at the bottom of the handlebar clamp until you can swing one side free through the open slot in the lower clamp.
3. Position the clamp on your handlebar where there is sufficient room for the clamp and your fingers for tightening the knobs.
4. Tighten the knobs until snug, then adjust the angle of the mounted DogBone extension using the adjustment knob at that joint
5. When everything is where you want it, go back and tighten all the knobs some wore.
6. Make sure to connect the leash to the multi kits and use the hook around the bar and back to the leash when riding.
Tips: Try pointing the handlebar clamp forward on the left side of your bike stew with the V DogBone aiming down. This hangs the multi kits upside down with the lens close to the centerline of your bike and keeps the multi kits out of your immediate vision.
• Try different positions to see what works best for avoiding excessive vibration during your riding and any suspension you may be running For best results, try to keep the multi kits clear of any cables that way rattle against it or appear in your shot.
Mounting to Seatpost
Face it backwards to see what you’re leaving behind, or maybe who’s right on your tail.
1. Remove the 1” DogBone extension by loosening and removing the adjustment knob and hex bolt at its base. Store these back in the case when not in use for safe keeping.
2. Mount your multi kits to the top of the Bar Mount using the adjustment post knob. Use the hex wrench to tighten if needed.
3. Loosen the adjustment knobs at the bottom of the handlebar clamp until you can swing one side free through the open slot in the lower clamp.
4. Position the clamp on your seat post where there is sufficient room for the clamp and your fingers for tightening the knobs.
5. Tighten the knobs until snug, then adjust the angle of the multi kits.
6. Make sure to connect the leash to the multi kits and use the hook around the post and back to the leash when riding.
Tips: Hang the multi kits upside down close to the underside of your seat. This should keep the multi kits out of the way of your legs. Make sure the multi kits is clear of any rear suspension travel. (just don’t get too far behind the saddle on those down hills)